Shadowrocket Setup Guide:
Import a Subscription and Verify the Connection
Follow this sequence: import → choose a mode → connect → verify → troubleshoot. For the initial setup, establish a connection you can verify before adjusting rules and automatic connection conditions.
01 / Add or Import
Add Server: Import a subscription or enter server details
Open Shadowrocket and go to Home at the bottom. First, identify the details you have: a subscription link is typically used to import and continuously update a group of servers, while individual server details include a protocol, address, port, and authentication parameters. They serve different purposes, so do not paste an entire subscription link into a server's Host field.
For an existing subscription link: Choose Subscribe
Tap the add button in the upper-right corner of Home, or tap Add Server in the SERVER group to open the add page. Tap Type, select Subscribe, then enter the complete subscription link from your service provider in URL. You can add a note to help identify it. Check that there are no spaces, line breaks, or punctuation added by a messaging app around the link, then save.
After saving, return to Home and wait for the subscription to finish retrieving its contents. When successful, the imported server entries should appear in the relevant group. Expand the group and check its contents rather than checking only whether the subscription name is visible. If the group name appears but there are no selectable entries inside, the import has not completed successfully. Check the update result before proceeding to connect.
To update a subscription later, choose the update action from the subscription entry's menu, then check the currently selected server when the update finishes. An update may change names, add or remove entries, or change the previously selected item. Subscription links contain access credentials; keep them on your own devices and do not include the full link in public screenshots or diagnostic messages.
For individual server details: Enter the fields for the matching Type
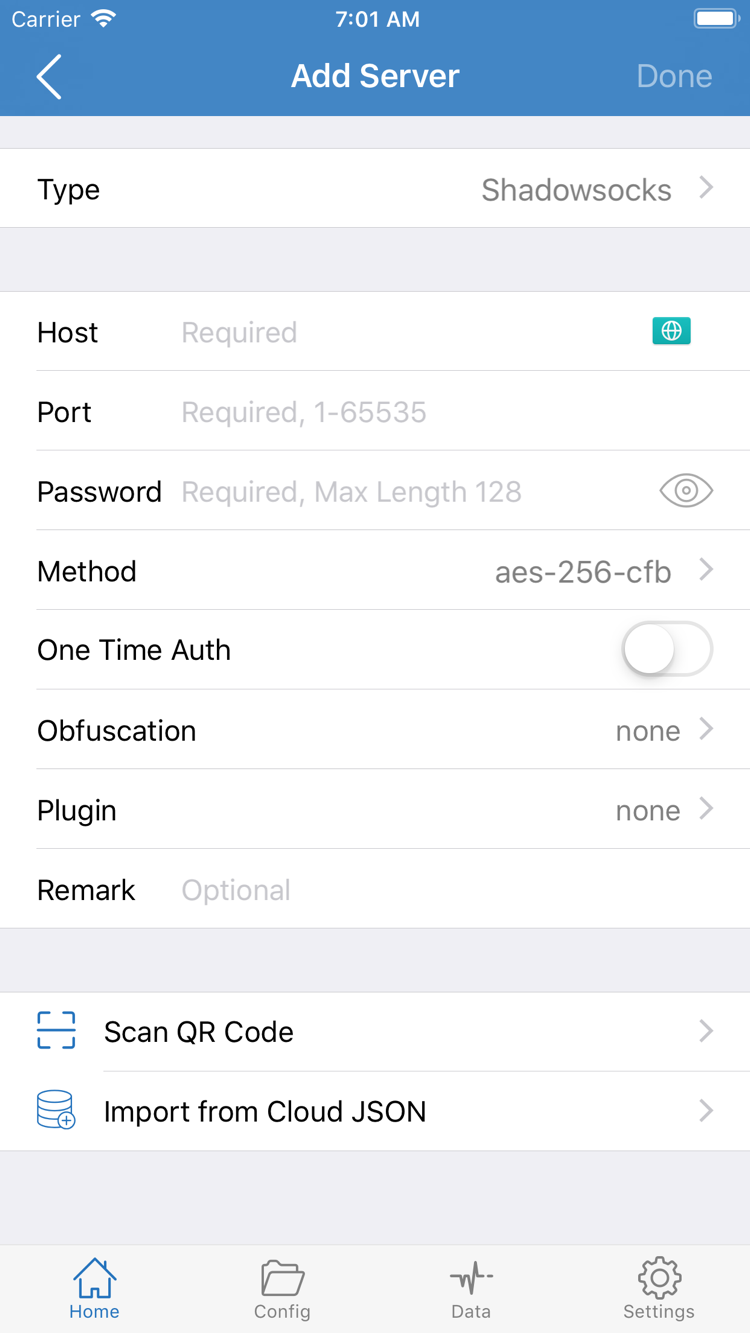
If your service provider gives you individual parameters, select the matching protocol under Type in Add Server, then check Host, Port, and the authentication fields one by one. Host is generally a server domain or IP address without a web path; enter Port as the number provided. The fields may change when you select a different protocol. Do not reuse a password, identifier, or transport setting from one protocol for another.
The screenshot shows an add page with Password and Method fields. These apply to the relevant Type; not every protocol requires them. If TLS, Server Name, or other transport parameters are required, enter them according to the service provider's details. Do not guess values that were not provided. If a QR code is available, use Scan QR Code. Import from Cloud JSON is for the relevant import format, not a universal option for all subscription links.
After saving, return to Home and tap the entry you just added. Confirm that the selection mark is on the intended item. This completes the step of adding details to the app; it does not verify that the server is reachable. Next, choose how requests will be handled with Global Routing, then connect so you can interpret the test results.
02 / Modes and Rules
Global Routing: Choose Config, Proxy, or Direct
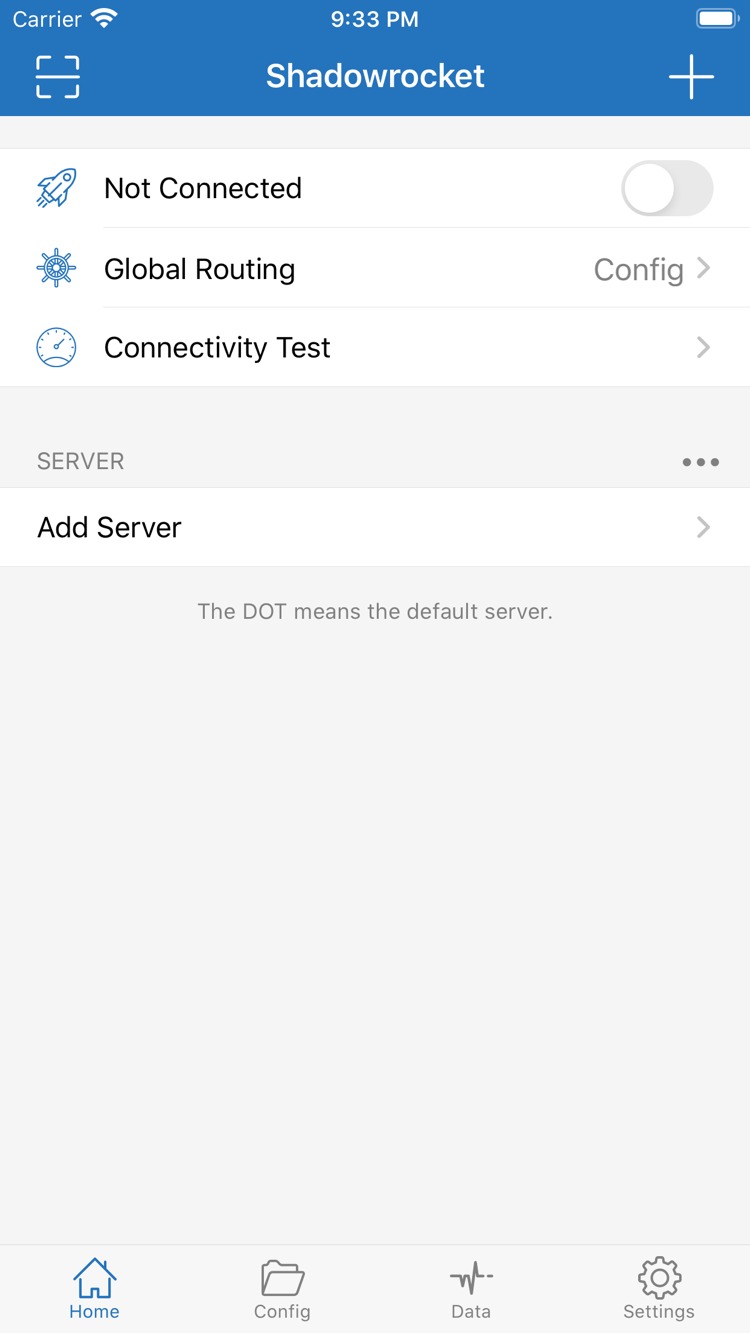
Return to Home and tap Global Routing to check the current mode. This determines how requests are routed, which is separate from the server you select: the former controls the routing method, while the latter is the server used when a request needs a proxy. If access does not work as expected right after import, check this setting before repeatedly switching servers.
What to check in each of the three modes
Config: Requests are matched against the rules in the currently enabled configuration file, and different requests may use different policies. Choose this mode for everyday rule-based routing, but first confirm which file is enabled in Config. Do not assume that suitable rules are in place based on the mode name alone.
Proxy: Requests use the proxy route. This can help you check whether the server connection works, but it does not mean a particular rule has matched or guarantee that all system traffic follows the same route. After testing, switch back to Config if you need rule-based routing, then verify an actual request again.
Direct: Requests use a direct route without being forwarded through the selected proxy server. This can help you compare whether the local network can reach a destination directly, but it does not verify that the selected server works. If the mode remains Direct, simply switching servers usually will not change the route.
Check the current file before using Config
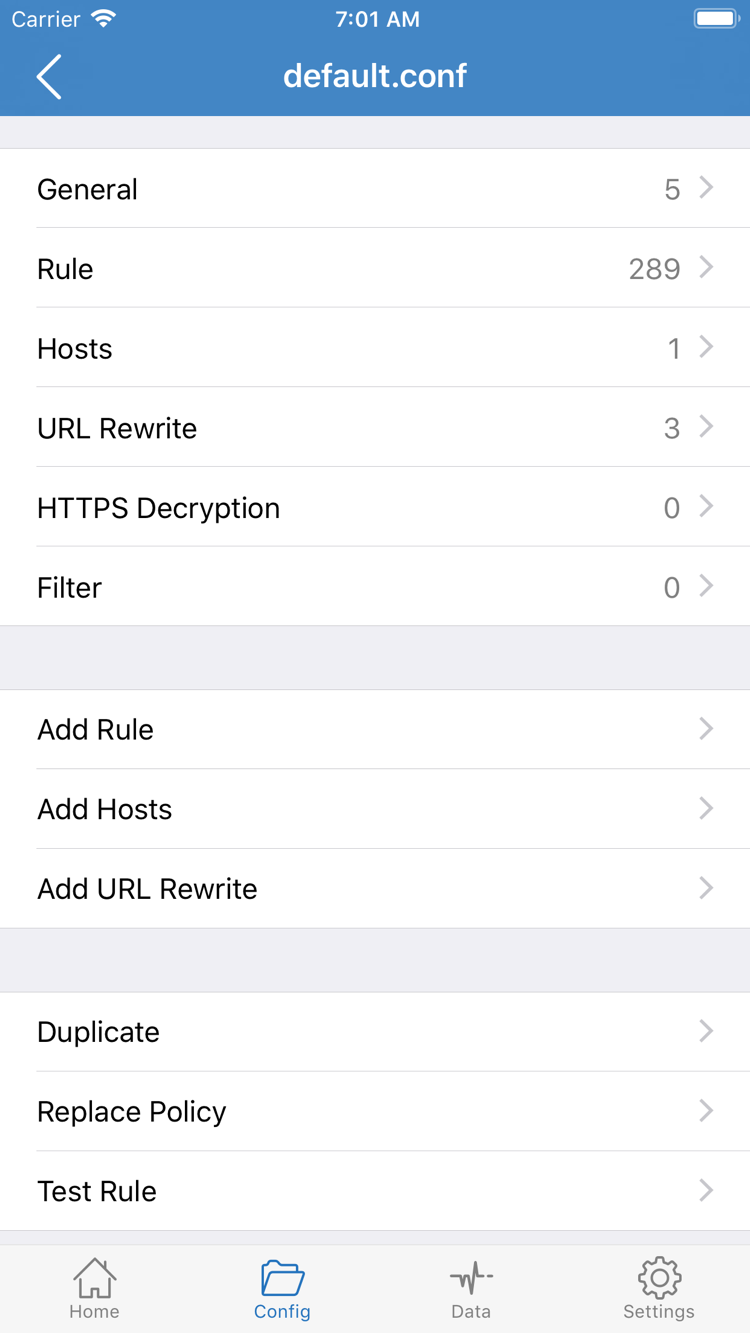
Go to Config at the bottom and check which file is currently enabled, then open that file to view its contents. In the editor, General manages general parameters, Rule handles rule matching, and Hosts concerns address mapping. URL Rewrite and HTTPS Decryption are additional request-handling settings; there is no need to enable every option just to make an initial connection.
Rules are generally evaluated from top to bottom. Once a rule matches, its corresponding policy handles the request. When checking rules, look at both the match condition and the final policy; the presence of a domain rule does not mean it uses PROXY. Before using Add Rule, keep a copy of the original file so you do not mix up connection verification issues and rule changes.
At this stage, you only need to know which Config is in use and the likely route for the destination. If you are unsure, do not add many rules at once. For more information about protocol fields, match order, and policies, see the protocol reference. For common questions about global modes, see the FAQ.
03 / Connect and Authorize
Home: Select a server and turn on the switch at the top
Return to Home, expand the imported SERVER group, and tap the server you plan to use. Check that Global Routing still matches your selection from the previous step, then turn on the connection switch at the top. Confirming these actions separately helps avoid changing an entry while unintentionally keeping the mode from an earlier test.
When connecting for the first time, the system may prompt you to authorize adding a VPN configuration. Confirm that you initiated this action in Shadowrocket, then allow it as prompted by the system and authenticate using your device's verification method. This creates a system configuration the app needs to handle network requests; it does not purchase a new connection service. If you cancel authorization, return to the app, turn on the switch again, and confirm the prompt.
After authorization, return to Home and check whether the previous Not Connected status at the top changes to connected. If it does not, stay on the current page and check whether you handled the system prompt and whether the intended entry is still selected. Do not repeatedly tap the switch. A connected status only indicates the state of the connection process; it does not replace testing an actual request to a destination website.
For the first test, keep Shadowrocket in the foreground and avoid enabling complex automatic connection conditions. Do not switch between Wi-Fi and cellular during the same test. If another VPN connection is already active on the device, check the active connection in system settings to ensure you are testing the intended one.
At this step, confirm that a server is selected, Global Routing has been checked, system authorization is complete, and Home shows an established connection. Proceed to verification once all four are in place. If the top status changes briefly and then returns to Not Connected, go to step five and check the connection parameters and network.
04 / Verify the Result
Connectivity Test: Test first, then verify an actual request
Once connected, tap Connectivity Test on Home and wait for the result. It can help check whether the current test target completes the relevant connection process, but a single successful result applies only to the conditions involved in that test. Results may vary depending on the target, current network, and test method. Do not treat one result as proof of access for every app.
Next, open a browser and visit a website you are authorized to use where you can determine the expected result. With Config selected, check destinations expected to use Direct and those expected to use a proxy separately. If you used Proxy only to compare connectivity, switch back to Config when finished and repeat the same request. Keep the server and local network unchanged while comparing results, and change only one factor at a time to make the comparison useful.
To check routing in more detail, return to Shadowrocket and review the request records or diagnostic information available in your current version. Look for the destination you just visited and the policy it actually used. Changes in traffic under Data can indicate that a request occurred, but increased traffic alone does not prove that a particular Rule matched. Consider the destination, current Config, and specific policy together.
If the browser still shows old content, refresh the page or reopen the destination before checking the new request. Browser cache, an app's reused connections, and DNS cache can make the result of a switch less obvious. Do not judge whether the server change succeeded based only on a page that was already loaded in the browser.
If Connectivity Test succeeds but a particular website fails, keep the working settings and first check destination-specific rules, resolution, and server-side conditions. If all destinations fail, check the connection and server details again rather than making broad Rule changes. The next section covers checks in order based on where the failure occurs.
05 / Settings and Troubleshooting
Settings: Check each layer based on where the failure occurs
Start troubleshooting by noting three things: whether the failure occurred during import, connection, or actual access; whether you were using Wi-Fi or cellular; and which settings you changed just before it happened. Keep these conditions in mind and follow the checks below. This is more likely to identify the cause than changing the subscription, protocol, and app installation all at once.
Subscription fails to import or has no entries after an update
Return to the subscription settings and check that the URL is complete and has not expired, and that the retrieved content is still a subscription provided by your service provider. A link opening in a browser does not necessarily mean it returns content supported by the app. If it returns a login page, a message, or empty content, it still cannot generate a server list. First confirm that the device has a working network connection, then check the link status and format with your service provider.
If only one of the original entries is missing after an update, first check whether the group is collapsed or the entry name changed, then select an available entry again. Do not repeatedly restore old subscription contents just to recover a name. Check with your service provider to confirm whether a server is still available.
The switch will not stay connected or tests keep timing out
First confirm system VPN authorization, then check Type, Host, Port, and authentication parameters one by one. A connection timeout may be related to the address, port, current network, or server status; a timeout alone does not mean the password is wrong. If you see an authentication-related message, focus on the relevant fields. To compare Wi-Fi and cellular, finish one test before switching networks and record the result.
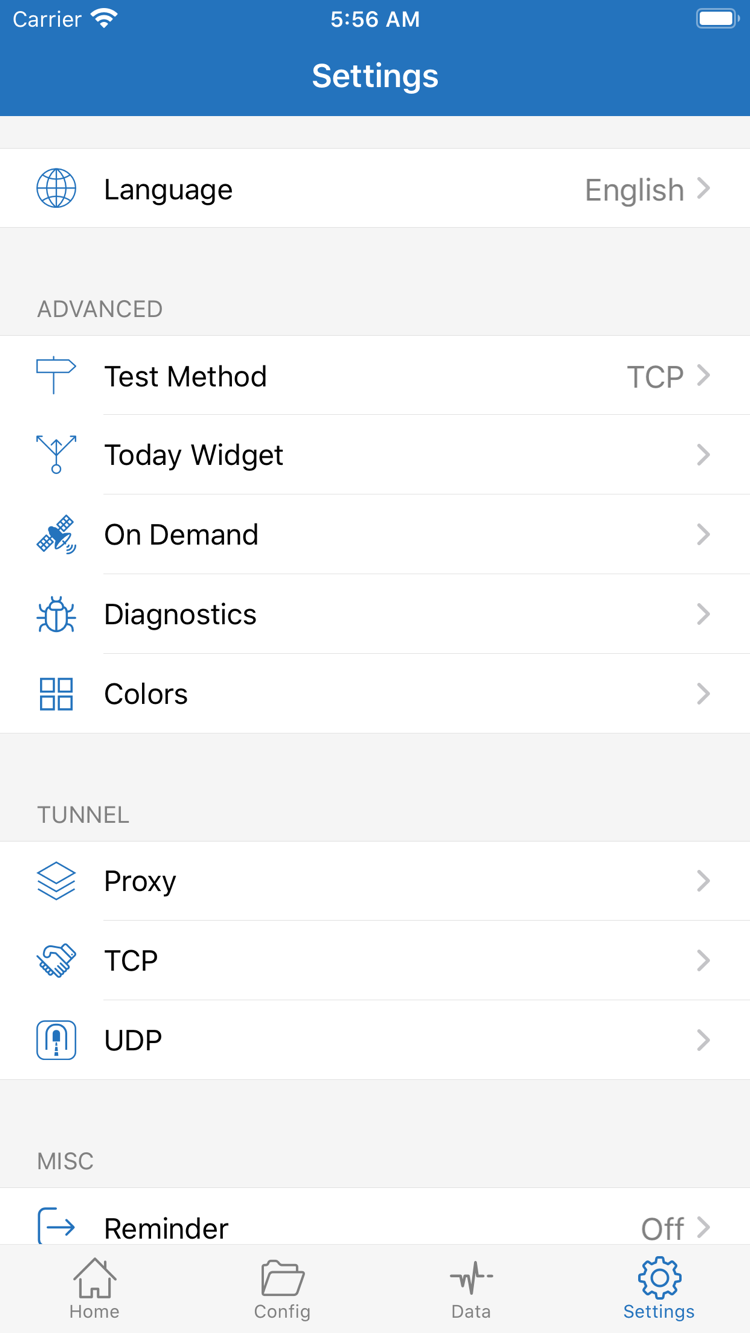
Go to Settings at the bottom to view Test Method and Diagnostics. Different Test Method options measure different processes, so do not treat results from different methods as a direct comparison under identical conditions. Diagnostics helps gather clues; it does not automatically fix issues. Check records close to the time of your last test to avoid being misled by older errors.
Connection works, but some requests do not behave as expected
First check Global Routing, then the enabled Config. Under Config, check whether an earlier Rule matches the request, whether its policy is the expected one, and how the final rule handles requests that do not match. If only one domain has an issue, also check Hosts and DNS-related settings. Do not immediately change all TCP and UDP parameters; that adds more variables.
If the app reconnects automatically after you disconnect manually, check the On Demand conditions in Settings. To reproduce a manual test, note the existing conditions and temporarily disable automatic triggers. Restore them one at a time after confirming the basic connection. For more about On Demand trigger scope and rule order, see the On Demand guide.
When reporting an issue to your service provider, include the failure stage, network type, selected protocol, and comparison steps you have tried. Remove subscription URLs, passwords, identifiers, keys, and other sensitive information from Diagnostics records or screenshots before sending them. For more subscription update and connection help, see the FAQ. For protocol parameter details, see the protocol reference.